Ergonomics of Handles in Pottery Trimming Tools
Ergonomics of Trimming Tool Handles
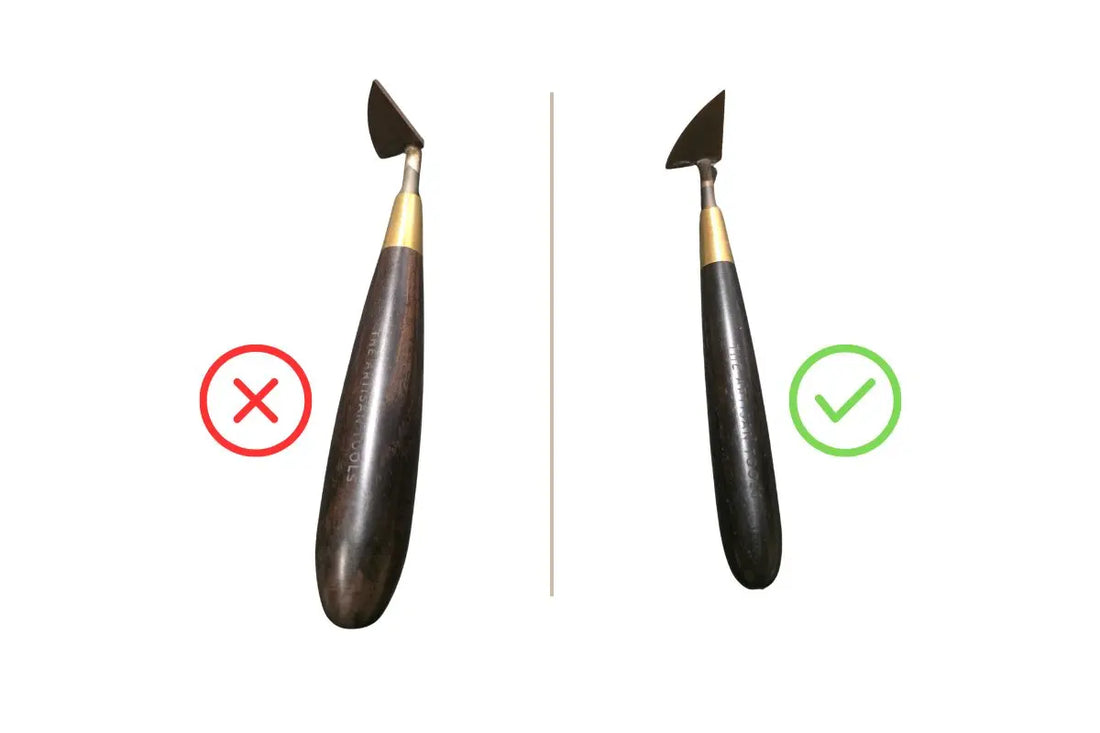
Trimming clay should feel comfortable and precise, not like a fight with the handle of your tool. That’s why we spent a lot of time rethinking this aspect, testing and changing our wooden handles several times until we finally found a smaller, rounded shape that fits better in the palm and is lighter in weight.
Also by using a narrower internal metal rod, the overall tool also became lighter. The result? More control and less fatigue.
In this post, we’d like to share what we learned during that search for the “perfect” handle, even though we know there’s no such thing as a single, final “best” one.

Why Ergonomics Matter When Trimming Clay
-Less force to stabilize the tool → greater precision on the rim.
-Neutral wrist position → reduces tension in the forearm and elbow.
-Better fine control of the cutting angle → smoother surfaces and less vibration (chatter).
During long trimming sessions, the difference between handle shapes becomes especially noticeable.
Tip: Although it’s not purely an ergonomic issue, keeping your trimming tool sharp is essential. A well-honed blade requires less pressure and fewer passes to achieve the desired result.If you’re using standard steel or stainless steel trimming tools, we recommend sharpening them regularly (just a little at a time). Another option is upgrading to high-end carbide trimming tools, which stay sharp much longer and cut more efficiently: Example of a carbide trimming tool
Trimming Tool with Wooden Handle: Size, Shape, and Grip
Size (diameter): if the handle is too large, it forces your hand open and puts tension on the thumb. If it’s too small, you tend to grip too tightly. The compact rounded handle we use aims for balance: it fills the palm without any strain.
Shape: the rounded profile distributes pressure evenly and rests naturally at the base of the palm. This makes it ideal for a power grip when trimming heavier pieces with more inertia. That’s why we don’t recommend the typical flat metal handles. If you still have one, try padding it yourself in a DIY way, because the thin plastic or rubber sleeve they usually come with is rarely enough.

Texture/Grip: Satin-finished wood provides a warm feel and a secure grip even with wet hands. Some potters prefer to add an anti-slip tape. In most cases, we believe it’s better to leave the handle as it is. But this will always depend on personal preference and the type of work you’re doing.
Other Handle Materials
There are also plastic handles (resins, etc.). From an ergonomic point of view, they’re usually better than metal ones because they tend to be rounded rather than flat. If we had to point out a drawback, it would be sustainability concerns, and in some cases, poor finishes or glued parts that don’t last.
Another common issue is that, since producing plastic handles requires expensive steel molds, manufacturers often reuse handles originally designed for other applications (like DIY spatulas), instead of developing one specifically for pottery trimming tools. As a result, they usually feel bulkier, less ergonomic, and require thicker, heavier metal rods inside.
They also often have a slightly wide tip, which prevents you from placing your fingers close to the blade as you would when holding a pencil.

Weight and Balance
A very heavy trimming tool may help stabilize some vibration, but it also causes fatigue much sooner. With a sharp, high-quality blade, you don’t need extra mass: the cut flows smoothly without having to “force” it.
For example, when we reduced the diameter of the internal metal rod inside the handle, we achieved less “torque” on the wrist, which made angle adjustments quicker and more agile. This weight reduction is especially noticeable when you need control on thin walls.
We also don’t recommend handles that are too long, as they affect the center of gravity, and the excess length sticking out below the palm can cause problems in some situations.

Grip Tips
It’s not always possible, but try to keep your elbows close to your body. If you can find a point of support with a finger or the heel of your hand (depending on the situation), even better. Don’t squeeze and let the blade do the work. With experience, if you adjust the angles little by little, instead of making sudden changes, you’ll notice much less vibration (chatter). The goal is to reach the desired result efficiently.
Thanks for reading 🙏
We hope this post has been helpful to anyone curious about the importance of handle shape and weight in trimming tools. For us, it was a trial-and-error process: Maybe not very professional, since we didn’t start from any proven theory behind it, and it took lots of iterations before we found the right design.
Of course, there are many skilled potters who use all kinds of handles (including the flat metal handles we didn’t recommend here) and still manage to trim efficiently in long sessions. So, in the end, it all comes down to personal preference: hand size and shape, trimming technique, habits, and the type of pieces you usually make.
As always, a million thanks for reading and bearing with our rambling 🙃. See you in the next post!

FAQ
Is a smaller handle always better?
Not always. The best handle is the one that feels “just right” in your palm, without forcing your fingers to spread too wide. If you’re unsure, it’s usually best to start with a compact handle, and then add a bit of grip tape if you need slightly more volume. You can even do this in a DIY way until it fits your hand comfortably.

Lightweight or heavier to reduce vibration?
With a sharp edge (preferably carbide) and the right technique, the lightweight option wins for comfort in about 90% of cases. If you’re working on large or hard pieces, it’s usually better to prioritize a rigid geometry rather than adding mass.
How can I reduce fatigue when trimming?
Choose a handle that fits your hand, keep your wrist neutral, and look for a support point whenever possible. Work with a well-maintained edge and take progressive passes. Avoid using dull tools — even if they can “push through” clay, it’s better to stop and sharpen them a little. That applies to steel or stainless steel tools. If you’re using carbide trimming tools, sharpening won’t be necessary.
Explore our Carbide Trimming tools collection
tAt-The Artisan Tools.