How to Sand and Polish Glazed Ceramics Step by Step (Complete Guide with Diamond Sanding Pads)
1. Why Sand After the Final Firing
Even though the glaze layer comes out finished, small burrs, drips, or sharp edges may sometimes appear. To remove them, we need an abrasive harder than the glaze itself( which is essentially glass), and that would be diamond. Conventional sandpaper would barely scratch the surface.
2. Tools to Use
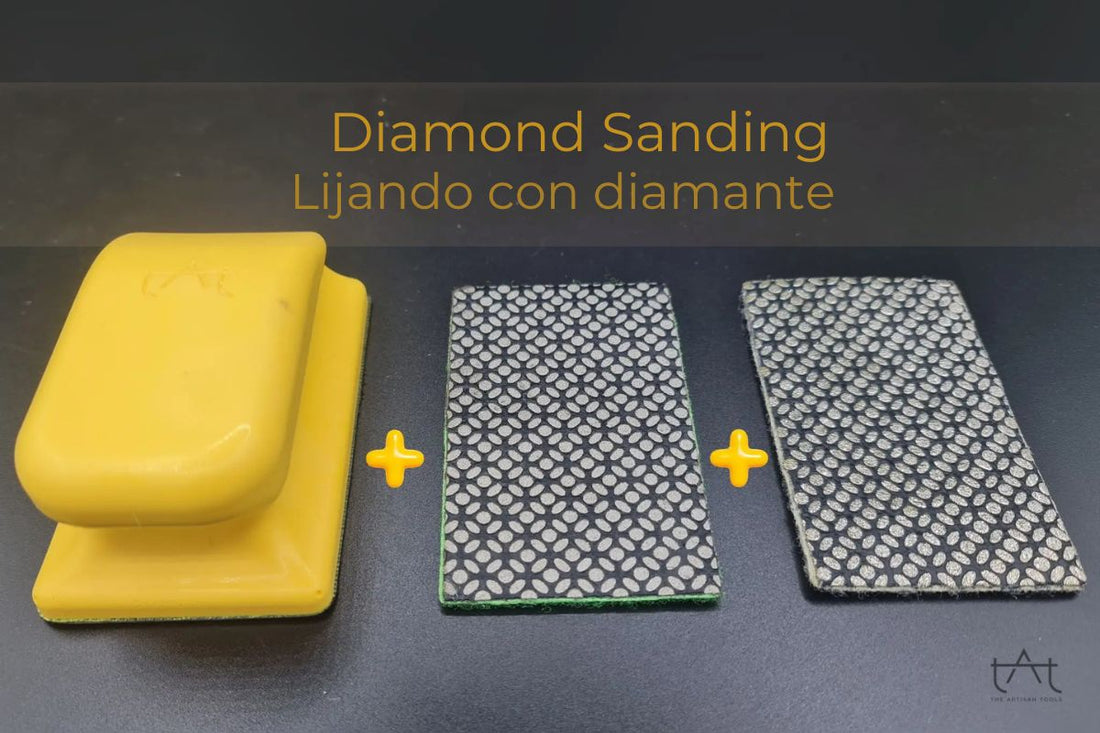
-Flexible sanding block with Velcro: allows you to control the pressure and adapt to curved surfaces.

-Diamond sanding pads, medium and fine grit: for example, if you want to grind down imperfections first (medium grit) and then polish (fine grit). Some people use the fine grit to achieve a satin finish.

-Container with water: Wet sanding extends the life of the diamond and also reduces the dust generated during sanding. It also softens the process and makes sanding more manageable.
-Safety goggles and FFP2 mask: Since glass particles are often produced during sanding, we recommend using goggles and masks. Especially in workshops, there are usually a lot of particles floating in the air, so it’s good practice to use a mask during key processes and to keep the workspace well ventilated.
3. Step-by-Step Example Using Both Grits:
-
Assess the area: Identify “defects” such as glaze drips, burrs, etc. Depending on the case, you can mark the area with a pencil to avoid going too far.
-
Prepare the piece and the sanding pad: You can submerge both in water; diamond works better when wet and also overheats less.
-
Initial grinding (coarse grit, more aggressive): With gentle circular motions, keep the sanding block at a low angle. Don’t press too hard: let the diamond do the work.
-
Intermediate rinse: Rinse the surface to check progress and prevent ceramic residue from clogging the pad.
-
Final polishing (fine grit): Switch to the fine grit pad. Same process with gentle movements.
-
Dry and quality check: We like to run a finger along the edge to feel the surface (some people use a piece of cotton). If it doesn’t catch, the finish is ready.
4. Frequently Asked Questions
Can I use it on bisque (bisqueware)?
Yes, it works, and it performs well, but there are cheaper alternatives like regular sandpaper or silicon carbide sponges.
Wet or dry?
Whenever possible, go for wet sanding: it smooths better and extends the life of the abrasive.
Does it work on stoneware, porcelain, and red clay?
Yes, it works well on all of them.
What if the piece is large?
It can still work, but for large surfaces you might also consider other options like diamond discs attached to the potter’s wheel.
If you want to see the full description and video of the sanding block and pads set, you can click on the image below to go to the product page:

thanks for reading us!