How to Smooth (Sand) Your Ceramic & Pottery Pieces
Share
Sanding and Smoothing Ceramics: A Practical Guide
For example, if we have a bowl, a cup, a teapot, a plate, a vase, or similar whose base isn’t stable and “wobbles” a bit, we usually want it to end up smooth.
There’s more than one way to smooth clay pieces, and today we’ll focus on the following methods, depending on the stage the clay is in.
-
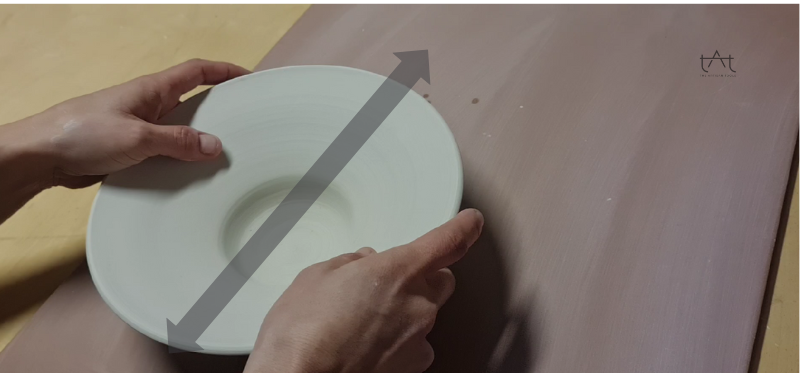
Sanding clay at the greenware stage:
A very good trick is to use a large tile, as shown in the photo:

by rubbing the clay bowls on the surface of this tile, you gradually smooth and polish the base.
It’s a great tip because the material removal you get this way is very gentle and natural. Detail of the base of the ware:

Here you can see the “dust” that comes off:

-
Sanding clay at the bisque stage:
At bisque, you can use almost any type of abrasive to smooth or sand the base. for example,standard paper sandpaper sheets. They’ll clog quickly with clay, so it’s better to use an inexpensive abrasive (e.g., the paper type mentioned).

-
Sanding high-fired ceramics:
Once the piece has been fired to high temperature, it’s harder to remove material because the clay becomes very hard after the high heat.
You can use diamond discs attached to the wheel or to a bat/plate. Taking advantage of the wheel’s rotation and pressing the base of the piece against the disc, you can gradually polish it. It’s recommended to wet the disc so the abrasion is more even and gentle.

Another option is to use hand-held diamond sanding blocks, combining different grits.
